Category Archives: Garden Tips

Houseplant of the Month: Norfolk Island Pine
Norfolk Island Pine Plant Features An easy-care houseplant, Norfolk Island pine is a festive holiday [...]
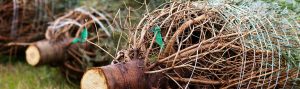
Balsam vs. Fraser Fir? How to choose.
Fa la la la! It’s the most wonderful time of the year–and our favorite part [...]
Why Plant in Fall?
Many folks are surprised to learn that autumn runs a close second to spring as [...]
Add These Fall Favorites
It’s officially Autumn! Fall is a glorious time of year. The countryside is virtually exploding [...]
Houseplant of the Month: Dracena Marginata
Dracaena marginata is a very popular houseplant that typically grows to 6’ tall or more [...]
Houseplant of the Month – Croton
The croton is an easy-to-grow houseplant known for its variegated foliage covered in green, scarlet, [...]
Beautiful Bulbs…Easily!
Part of the allure of gardening is the anticipation. There is nothing more intoxicating than [...]
Mum Basics
Chrysanthemums (mums) are one of the most popular fall flowers for the garden. Most [...]