Category Archives: Garden Tips

Fall is For Planting
Many folks are surprised to learn that autumn runs a close second to spring as [...]

Perennial of the Month: Aster
Asters are daisy-like perennials with starry-shaped flower heads. They bring delightful color to the garden in [...]
Houseplant of the Month: Easter Lily
Did you know that Easter lilies are the fourth largest potted plant crop grown in [...]
Why We Garden
Gardeners tend to be optimistic. The simple act of planting a tree shows vision, creativity [...]
Farm Market Curbside Service
We are offering a new Curb Side Pickup for all of our products. We are [...]
Houseplant of the Month: Shamrock
What is a Shamrock Plant? The potted shamrock plant (Oxalis regnellii) is a small specimen, [...]
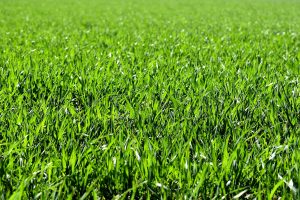
How to Read a Grass Seed Label
If more is better, than a lot should be great! That seems to be the [...]

Houseplant of the Month: Monstera Deliciosa
Monstera may be the perfect houseplant for you if you’re looking to create a big, [...]