Category Archives: Garden Tips

Seeds of Joy
Starting plants from seeds is a fun and easy way to stretch those gardening dollars. [...]

Houseplant of the Month: Anthuriums
Anthurium Care Family: Araceae Common Name: Flamingo Flower, Tail Flower, Painted Tongue Plant Botanical Name: [...]


Give the Gift of Gardening
…and you never have to worry about getting the wrong size! Selecting gifts for family, [...]


Keep that holiday greenery fresh!
The holiday season is fast approaching and soon it will be time to deck the [...]

Designing With Trees
Fall is for Planting! Trees are a fundamental element of any landscape plan. The proper [...]
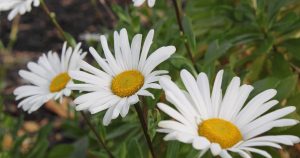
Featured Plant: Montauk Daisy
Delicate white Montauk daisies (Nipponanthemum nipponicum) grow a profusion of 2-inch flowers in late summer. [...]