Category Archives: Garden Tips

Inspirational Garden Ideas for 2023
Now is the time to put the holidays behind us and start dreaming about your [...]


Houseplant of the Month: Norfolk Island Pine
Norfolk Island Pine Plant Features An easy-care houseplant, Norfolk Island pine is a festive holiday [...]
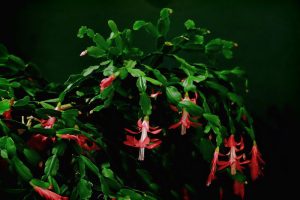
Caring For Christmas Cactus
Christmas Cacti are easy to grow. When they bloom, they produce colorful tubular flowers [...]

Storing Dahlias for Winter
Tips for storing your dahlias Dahlias tubers can be enjoyed for years with proper handling [...]


Re-Invigorate Your Lawn
Is your lawn looking weak and thin? Overseeding can help you get back to the [...]

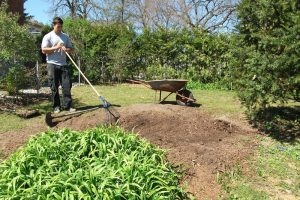
Fall is the Best Time For Planting!
Every gardener knows it. Fall is for planting. From the cooler weather and heaps of [...]